Now that we’ve been teased with a few warm days here and there, I am ready to say goodbye to winter and start styling my back deck for summer. I’ve found that a rug, some cute chairs and trendy planters can transform your outdoors space into a luxury oasis. I’m always on the lookout for planters with fun, modern patterns. But the good news is that some of the best ones are the ones you make yourself, like this modern geometric planter DIY.
This post contains affiliate links.
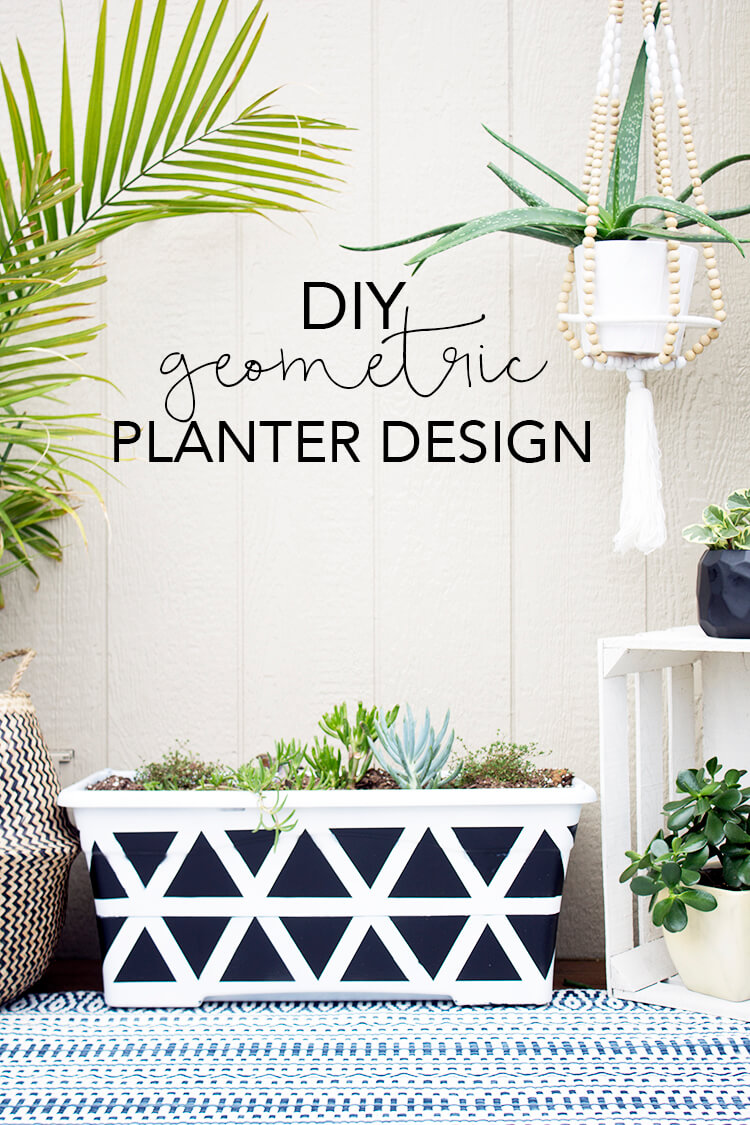
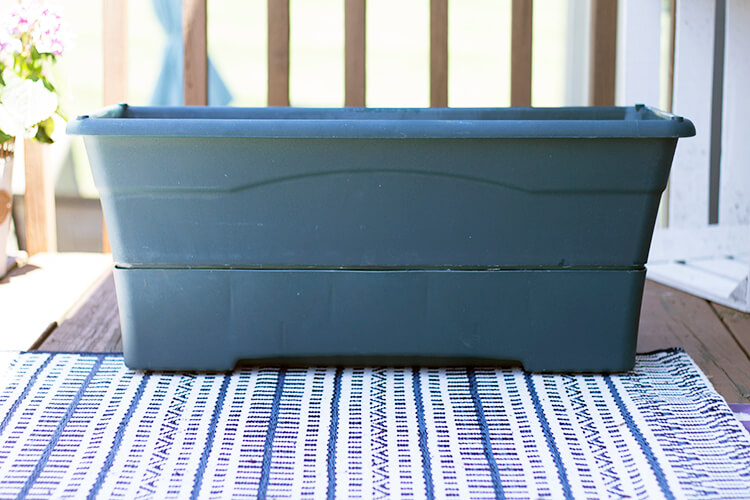
This thing was actually meant to grow tomatoes in. The tomatoes didn’t fair so well, but it’s been repurposed and it turns out I have better luck keeping other plants alive in there! I almost pitched it because it wasn’t exactly nice to look at before but I’m glad I gave this design a try.
All you need to transform your old planters is some black and white spray paint and some painters tape. Obviously you can make yours colorful, but I just love the look of the black and white!
Geometric Planter DIY Instructions
Paint first coat
First you need to clean your planter and paint your base coat. I went with white. Be sure to get around the edges!
You might need a couple coats to get it covered. Once that’s dry, you’re ready to start taping. I would actually wait about 24 hours between the first coat of paint and taping to give the paint a little time to cure. If you rush it, the tape will pull off your base paint color when you peal it off.
Start Taping
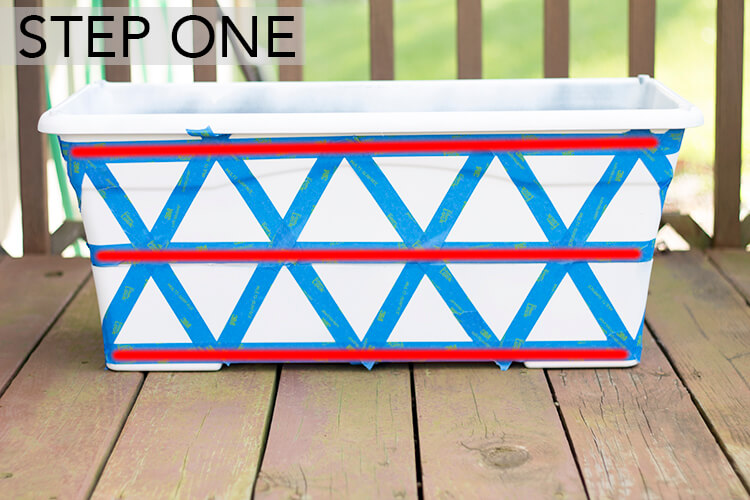
I just eyed my measurements here. Aint nobody got time to worry about if they’re exact or not. While not too complicated, it did take a minute to figure out exactly how to get my design on here, so I went ahead and outlined the steps for you.
Step 1: First do your 3 horizontal lines.
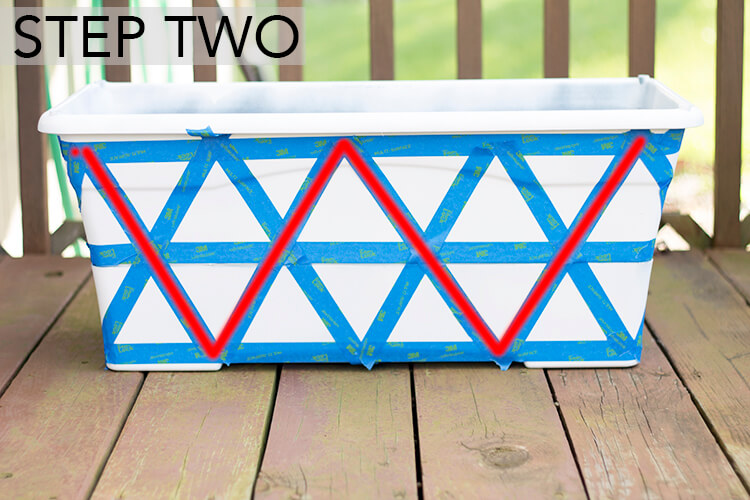
Step 2: Make a zig zag shape all the way from your top line to your bottom line. Continue making that shape until you get all the way around your planter. I found it was easiest to start at a corner if you’re doing a square or rectangular planter.
Since we aren’t measuring, the corners likely won’t meet up exactly. Adjust your tape a little until they come together well enough. In the end, it won’t be noticeable and you can chalk it up to character when the triangles aren’t all the exact same size.
Step 3: Make another zig zag shape opposite of the first one so it’s cutting through the middle of the first one. Now you should really be seeing your triangles come to life.
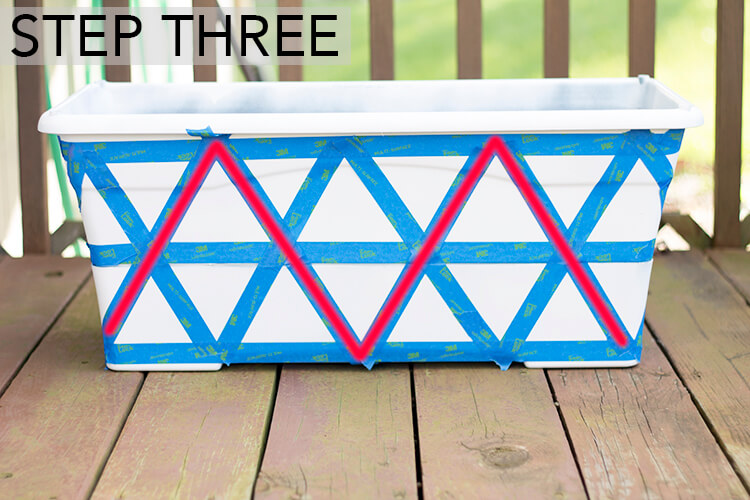
I don’t have a photo, but you will want to go ahead and tape off above and below your triangle cutoffs so you don’t accidentally have some overspray in those areas. Spray paint is notorious for that!
Spray your final coat
The last step is to spray paint your triangles the second color (black for me!). Give it some time to dry and then peal off your tape to reveal your masterpiece!
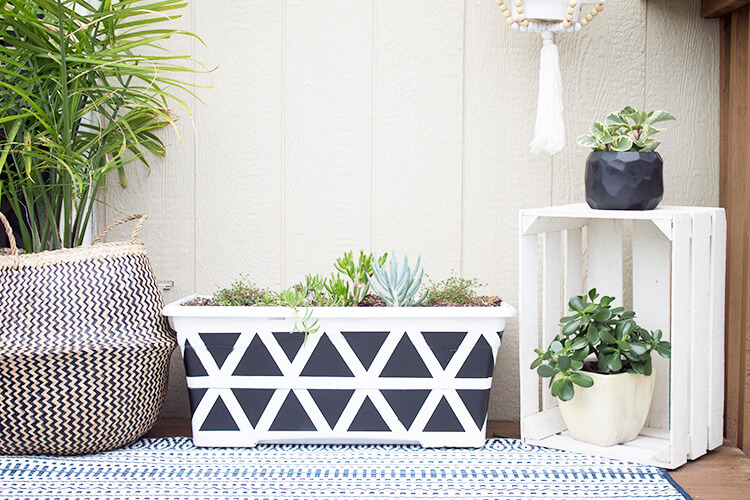
I absolutely love how this turned out and am itching to set up my outdoor spaces and fill this with new succulents! You just cannot beat a neutral AND trendy planter!
P.S. If you love houseplants as much as outdoor plants, here’s my advice for keeping succulents alive inside. And an even broader houseplant guide for beginners!
And you can also get my free houseplant watering guide here!
[embed_popupally_pro popup_id=”6″]


7 Top Minimalist Planters in Living Rooms - The Suburban Minimalist
Tuesday 25th of February 2025
[…] https://www.mybreezyroom.com/geometric-planter-diy/ […]
Enhance Your Space With Unique Outdoor Planter Ideas - My Breezy Room
Tuesday 3rd of October 2023
[…] at a big box store, and you find the perfect planter, but you’re looking for a different color. Painting a planter is a simple task you can do at home. Spray paint is the easiest option; however, this depends on […]
Cheryl
Saturday 20th of April 2019
Great idea how did you fill it?
Loreen
Wednesday 8th of August 2018
This is my all time favorite on here. Thank you!!!